
Customize UINavigationBar Appearance
In Last tutorial we have created a project in which we have created an application using UINavigationController.
In this tutorial , we will go one step ahead and learn about how to customize the navigation bar appearance.
In this tutorial main points on which we are going to focus is as follows :
1. Introduction to Appearance API
2. Customize the navigation bar image/Color with text using Appearance API.
3. Customizing the appearance of UIBarButtonItem.
1. Introduction to Appearance API
iOS 5 inserts a new way to procedure an application, by applying visual property settings (properties like as tint color,background likeness, etc.) at a static class level so that the change applies to all examples of that control in the application.
iOS 5 allows us to make customize the appearance of many UIKIT controls [toolbars, navigation bars, buttons and sliders]. in this tutorial we will learn to customize the behavior of Navigation Bar.
For this tutorial we are not going o create a new project rather then this we will use the same project which we have created in our previous tutorial in which we have introduction to UINavigationController.
If you haven’t go through it then Download the source code from here.
2. Customize the navigation bar image/Color with text using Appearance API.
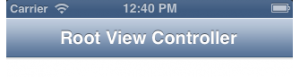
When you download the source code above link and run the project. you will see a navigation bar like below image
First we will customize the UINavigationController‘s background.
So for that we will use appearance api. Go to AppDelegate.m file and Create a method and give the name it to “CustomizeNavigationbar”
In this method we will replace a new background for UINavigationBar. so for that we need a image which we are going to set as a background of UINavigationBar.
So download the image from here. and add it into your project.
![]()

While you are adding image at that time don’t forgot to check “Copy items into destination group’s folder…” option.
In Method ” CustomizeNavigationbar “Write the following line of code.
[[UINavigationBar appearance] setBackgroundImage:[UIImage imageNamed:@"navigationbar.png"] forBarMetrics:UIBarMetricsDefault];
Now your method look like following.
-(void) CustomizeNavigationbar
{
<span style="color: #ff6600;">// The below line will change the each navigatiobar's background image within this project.
</span>[[UINavigationBar appearance] setBackgroundImage:[UIImage imageNamed:@"navigationbar.png"] forBarMetrics:UIBarMetricsDefault];
}
And Call this method in “didFinishLaunchingWithOptions” method.
This is how your “didFinishLaunchingWithOptions” method look :
- (BOOL)application:(UIApplication *)application didFinishLaunchingWithOptions:(NSDictionary *)launchOptions
{
self.window = [[UIWindow alloc] initWithFrame:[[UIScreen mainScreen] bounds]];
TopviewController = [[ViewController alloc] initWithNibName:@"ViewController" bundle:[NSBundle mainBundle]];
navigationController = [[UINavigationController alloc] initWithRootViewController:TopviewController];
self.window.rootViewController = navigationController;
<span style="color: #ff6600;">// here we call our method.
</span>[self CustomizeNavigationbar];
self.window.backgroundColor = [UIColor whiteColor];
[self.window makeKeyAndVisible];
return YES;
}
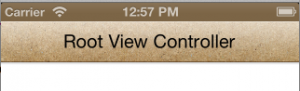
Now save and run the application.
This is how you navigation bar look now.
Now we will write some code in “CustomizeNavigationbar” Method to change the text attributes of UINavigationBar.
In below Line of code : we have made a dictionary of attribute which we are going to assign to textattributes of UINvaigationBar.
we have added a textcolor using “UITextAttributeTextColor“, Shadow Color uisng “UITextAttributeTextShadowColor” and font with “UITextAttributeFont“.
NSDictionary *_titleTextAttributes = @{UITextAttributeTextColor: [UIColor whiteColor],
 UITextAttributeTextShadowColor : [UIColor clearColor],
 UITextAttributeFont : [UIFont systemFontOfSize:20.0f]};
And assign all the attributes to UINavigationBar.
[[UINavigationBar appearance] setTitleTextAttributes:_titleTextAttributes];
This is how your “CustomizeNavigationbar” method looks like below. i have added a comment for each line of code. if you have any query feel free to comment.
-(void) CustomizeNavigationbar
{
<span style="color: #ff6600;"> // The below line will change the each navigatiobar's background image within this project.
</span> [[UINavigationBar appearance] setBackgroundImage:[UIImage imageNamed:@"navigationbar.png"] forBarMetrics:UIBarMetricsDefault];
<span style="color: #ff6600;"> // In Below line of code. we have made a dictionary of attribute which we are going to assign to textattributes of UINvaigation Bar.
 // we have added a textcolor using "UITextAttributeTextColor", Shadow Coloe uisng "UITextAttributeTextShadowColor" and font with "UITextAttributeFont".
</span> NSDictionary *_titleTextAttributes = @{UITextAttributeTextColor: [UIColor whiteColor],
 UITextAttributeTextShadowColor : [UIColor clearColor],
 UITextAttributeFont : [UIFont systemFontOfSize:20.0f]};
<span style="color: #ff6600;"> // And assign all the attributes to UINavigationBar.
</span> [[UINavigationBar appearance] setTitleTextAttributes:_titleTextAttributes];
}
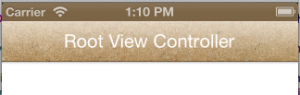
Now save and run your code.
Now we can see our “Root View Controller” in White color.
Now if you click on “Open Detail View” click, it will move to Detail view at that time UINavigationController look like below.
Here we can see that UIBarButtonItem is diff with theme.
So we will customize the UIBarButtonItem now.
3. Customizing the appearance of UIBarButtonItem.
For that we need the image which we are going to set in place default back button. so download the attached images.
![]()

So we will customize the UIBarButtonItem now.
Add following line of code in to “CustomizeNavigationbar” method.
This line will set background image to barbutton item
 NSDictionary *_BarbuttonTextAttributes = @{UITextAttributeTextColor: [UIColor whiteColor],
 UITextAttributeTextShadowColor : [UIColor clearColor],
 UITextAttributeFont : [UIFont boldSystemFontOfSize:13.0f]};
 [[UIBarButtonItem appearance] setTitleTextAttributes:_BarbuttonTextAttributes forState:UIControlStateNormal];
This is your method “CustomizeNavigationbar ” looks finally like below :
-(void) CustomizeNavigationbar
{
<span style="color: #ff6600;"> // The below line will change the each navigatiobar's background image within this project.
</span> [[UINavigationBar appearance] setBackgroundImage:[UIImage imageNamed:@"navigationbar.png"] forBarMetrics:UIBarMetricsDefault];
<span style="color: #ff6600;"> // In Below line of code. we have made a dictionary of attribute which we are going to assign to textattributes of UINvaigation Bar.
 // we have added a textcolor using "UITextAttributeTextColor", Shadow Coloe uisng "UITextAttributeTextShadowColor" and font with "UITextAttributeFont".
</span> NSDictionary *_titleTextAttributes = @{UITextAttributeTextColor: [UIColor whiteColor],
 UITextAttributeTextShadowColor : [UIColor clearColor],
 UITextAttributeFont : [UIFont systemFontOfSize:20.0f]};
<span style="color: #ff6600;"> // And assign all the attributes to UINavigationBar.
</span> [[UINavigationBar appearance] setTitleTextAttributes:_titleTextAttributes];
<span style="color: #ff6600;"> // this line will set background image to barbutton item
</span> [[UIBarButtonItem appearance] setBackButtonBackgroundImage:[UIImage imageNamed:@"barbutton.png"] forState:UIControlStateNormal barMetrics:UIBarMetricsDefault];
<span style="color: #ff6600;"> // and set the attributes for bar button item.
</span> NSDictionary *_BarbuttonTextAttributes = @{UITextAttributeTextColor: [UIColor whiteColor],
 UITextAttributeTextShadowColor : [UIColor clearColor],
 UITextAttributeFont : [UIFont boldSystemFontOfSize:13.0f]};
 [[UIBarButtonItem appearance] setTitleTextAttributes:_BarbuttonTextAttributes forState:UIControlStateNormal];
}
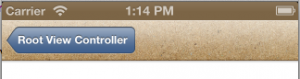
Now save run the code.
Here you see the navigation bar back button like following.
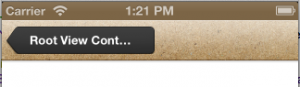
Here you can see the “Root View Controller” is truncated.so a question arise
How do a developer change the title of the Navigation Bar back button text ?
here is the solution.
Write down the below line of code before your pushViewcontroller
UIBarButtonItem *backButton = [[UIBarButtonItem alloc] initWithTitle: @"Back" style: UIBarButtonItemStylePlain target: nil action: nil];
[[self navigationItem] setBackBarButtonItem: backButton];
The above line of code change the NavigationBar back button title to “Back”.
In our example.
Go to ViewController.m file and write above line of code in to “-(IBAction)btnclick:(id)sender” method in which where we are pushing a view controller.
This is how your method -(IBAction)btnclick:(id)sender looks like below.
-(IBAction)btnclick:(id)sender
{
 DetailViewController *objDetail = [[DetailViewController alloc] initWithNibName:@"DetailViewController" bundle:[NSBundle mainBundle]];

<span style="color: #ff6600;"> // as per above line we create object of DetailViewController.
</span>
 UIBarButtonItem *backButton = [[UIBarButtonItem alloc] initWithTitle: @"Back" style: UIBarButtonItemStylePlain target: nil action: nil];
 [[self navigationItem] setBackBarButtonItem: backButton];

<span style="color: #ff6600;">// The above line of code change the NavigationBar back button title to "Back".
</span>
 [self.navigationController pushViewController:objDetail animated:YES];

<span style="color: #ff6600;"> // This is how we can open a view controller using NavigatioController.
 // In this method we have to pass an object of a UIViewcontroller. it Uses a horizontal slide transition.
</span>}
This is how your UINavigationBar back button look like.
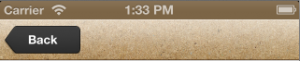
Its done 🙂
If you have any question or comments , please feel free to post. I would love to hear them.